


If you want to know how many people visited your site, how your site is performing, which web page is creating wonders on search engines, or how people are responding to the blog posts, you definitely need to add Google Analytics to your WordPress website.
Understanding your site’s performance is crucial for its success, and Google Analytics is a powerful tool that gives worthy insights into your website’s traffic, user behaviour, and much more.
It can help you understand how people are using your WordPress website by tracking things like time spent on the site, bounce rate and page views. This information can be utilised to improve your website and make it more successful.
[Also read: The Ultimate Guide to Improve Your WordPress Website Speed and Performance]
Adding Google Analytics is crucial to gather your website’s performance information. However, the installation process might be a daunting task for some.
Therefore, in this guide, we will walk you through the process of adding Google Analytics to your WordPress website and provide related details to help you make decisions based on important information and data-driven insights. Let’s begin!

What Google Analytics Can Track?
As we all know, Google Analytics is a robust free web analytics service offered by Google that assists you in figuring out how people are interacting with your website.
Google Analytics tracks and reports on various data points and provides valuable insights into user behaviour, traffic sources, conversion rates, etc. It lets you gain invaluable insights into your WordPress website performance and helps you make informed decisions to optimise its online presence.
Some key aspects that Google Analytics can track are:
- Traffic and Acquisition
Google Analytics helps you track the site’s traffic, which includes the number of visitors, sessions, page views, and unique visitors. It also enables you to learn about the traffic source, i.e. where your visitors are coming from, such as organic search, social media, direct traffic, referral traffic (clicks from other websites), and paid advertising. - User Engagement and Behaviour
With Google Analytics, you can see how many pages visitors view and how long they spend on your website. This can help you identify which pages are most engaging and which need improvement. The Google Analytics report also lets you determine the bounce rate on your website. A high bounce rate indicates your website is not meeting users’ expectations. - Audience Demographics and Interests
With Google Analytics, you can check your visitors’ age, gender, location, language, and device (desktop, mobile, tablet). You can also learn about their interests and affinities based on browsing history and online activity. - Conversions and Goals
Google Analytics can monitor your WordPress site’s conversion tracking goals and specific actions, such as form submissions, purchases, or other predefined objectives. Additionally, if you own an online eCommerce store, you can use the Google Analytics report to track your sales performance, revenue, product popularity, checkout process and transaction details.
Prerequisites of Adding Google Analytics to Your WordPress Website
Before adding Google Analytics to your website, there are a few prerequisites you should have in place. You need a Google account to sign up for and access Google Analytics. If you already have a Google account, sign in to it. If not, you’ll need to create an account before proceeding.
Follow the prompts on the Google Account creation page to set up your Google account. After this, follow the steps below to create a Google Analytics account and obtain the necessary tracking code. It will be used further to add it to your WordPress website:
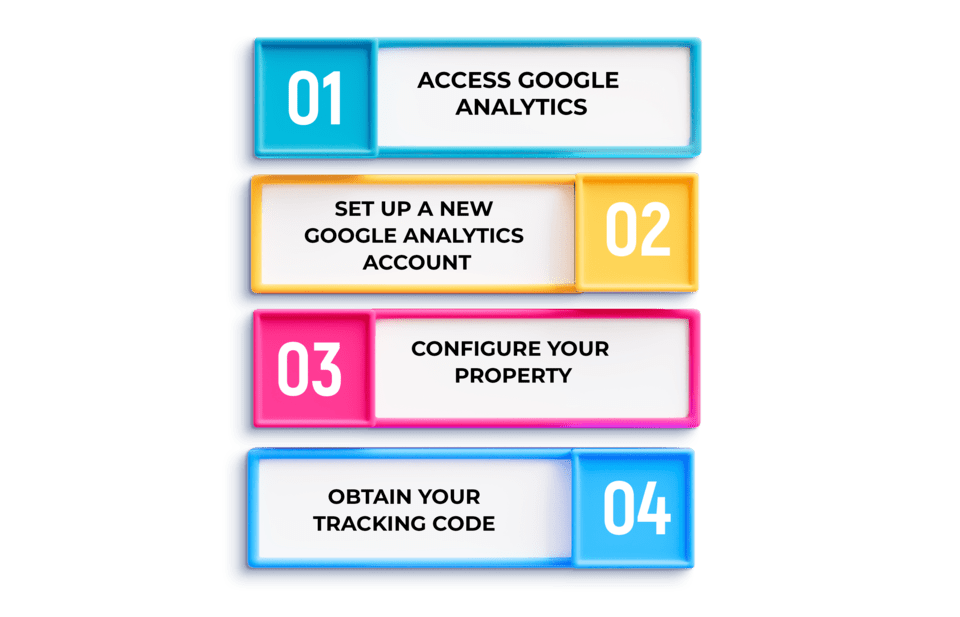
Step 1: Access Google Analytics
Once you are signed in to your Google account, visit the Google Analytics website to access the Google Analytics platform.
Step 2: Set Up a New Google Analytics Account
(a). Click on “Start for free” or “Sign up” in the top right corner of the page.
(b). Fill in the necessary information for your account:
- Account Name: Choose a name for your Google Analytics account.
- Website Name: Provide a name for the property (your website).
- Website URL: Enter your WordPress website URL.
- Industry Category: Choose the category that best represents your website.
- Reporting Time Zone: Select the time zone that corresponds to your location.
Toggle the switches for data-sharing options according to your preferences.
Click on the “Next” button.
Step 3: Configure Your Property
(a). Fill in information about your business under the “Business Information” section.
(b). Choose whether to set up Google Analytics 4 (GA4) or Universal Analytics (UA). For most users, GA4 is suggested as it is the latest version.
(c). Click on the “Create” button.
Step 4: Obtain Your Tracking Code
(a). Accepting the Terms of Service will redirect you to your Google Analytics account dashboard.
(b). In the “Admin” section, under the “Property” column, click on “Tracking Info” and then select “Tracking Code.”
(c). Copy the Tracking ID or the entire tracking code. The Tracking ID will look like UA-XXXXXXXXX-X.
Your tracking code is ready now, and it’s time to head towards integrating Google Analytics into your WordPress website. So. Let’s move forward.
How to Add Google Analytics to WordPress Website?
There are different methods to set up Google Analytics on your WordPress website. It can be done either by:
- Manually by inserting the tracking code into your theme’s header or
- Using a plugin for a simpler and more user-friendly approach
Assuming that you have already created your WordPress website (if not, you can learn to make a WordPress website by following a comprehensive step-by-step guide), let us explain the procedure for integrating Google Analytics below:
Method 1: Use a Google Analytics Plugin
Setting up Google Analytics on WordPress using a plugin is the most straightforward method. Let us check out the step-by-step process below:
Step 1: Choose a Plugin
As a first step, you are required to select the plugin. The most popular plugins for Google Analytics are:
- MonsterInsights (user-friendly, comprehensive features)
- Google Analytics for WordPress by MonsterInsights
- GA Google Analytics (simple setup)
- Jetpack (multiple features, including Google Analytics)
- Site Kit by Google (official plugin, integrates other Google tools)
You can opt for any plugin option at your convenience. Here, we will take an example of the popular plugin MonsterInsights. It is an open-source plugin with several streamlined features.
Step 2: Install and Activate MonsterInsights Plugin
The next step is to Log in to your WordPress site Dashboard with your username and password and follow the given steps to install the MonsterInsights Plugin:
(a). Navigate to Plugins:
- Go to “Plugins” in the left-hand menu in the WordPress dashboard.
(b). Add New Plugin:
- Click on “Add New.”
(c). Search for MonsterInsights:
- In the search bar, type “MonsterInsights.”
(d). Install and Activate:
- Find MonsterInsights in the search results and click “Install Now.”
- After installation, click “Activate” to activate the plugin.
Step 3: Set Up MonsterInsights
(a). Access MonsterInsights Setup Wizard:
- MonsterInsights will prompt you to set up the plugin using a setup wizard upon activation.
(b). Connect Google Analytics Account:
- Click on the “Launch the Wizard” button.
- Follow the on-screen instructions to connect MonsterInsights to your Google Analytics account.
- Grant the necessary permissions for MonsterInsights to access your Google Analytics data.
(c). Choose Your Website Type:
- Select the type of website you are running (business, blog, etc.).
(d). Complete Setup:
- Follow the remaining steps of the setup wizard. Provide information as required, such as enabling advanced tracking features or configuring eCommerce settings if applicable.
Step 4: Verify the Insights
(a). View Google Analytics Dashboard:
- After completing the setup, you can view the MonsterInsights dashboard by going to “Insights” in your WordPress dashboard.
(b). Verify Real-Time Tracking:
- Visit your WordPress website in a new browser tab.
- Go back to the MonsterInsights dashboard and check the “Real-Time” reports to confirm that your website is actively being tracked.
You can start viewing the comprehensive Google Analytics reports on the MonsterInsights dashboard as you complete the steps. Keep exploring the MonsterInsights features that can enhance your tracking and reporting capabilities.
Method 2: Google Analytics Manual Integration
This method requires coding knowledge. Therefore, if you have a team of seasoned experts with expertise in coding or if you possess the basic know-how of codes and technicalities, this is another highly suitable and convenient method for you to add Google Analytics to your WordPress website. Let us see the steps below:
Step 1: Insert Tracking Code into WordPress Theme
You must have created your Google Analytics Tracking Code by following the above steps. So now, let’s learn to insert this code into your WordPress Theme to proceed with the Google Analytics integration process. Follow the given steps:
(a). Log in to Your WordPress Admin Dashboard:
- Enter your website’s URL followed by “/wp-admin.”
- Log in with your username and password.
(b). Navigate to Theme Editor:
- Go to “Appearance” in the WordPress dashboard and select “Theme Editor.”
(c). Find the header.php File:
- Find and click on the “header.php” file on the right side. Note that this file may be located in different places depending on your theme.
(d). Insert the Tracking Code:
- Paste the tracking code of Google Analytics just before the closing </head> tag in the header.php file.
- It should look something like this:
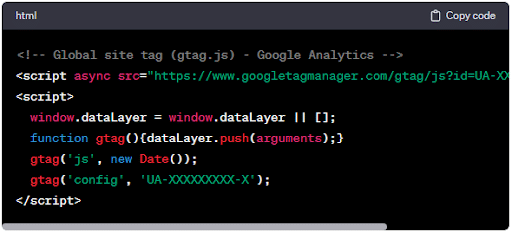
[Source: Quora]
(e). Save Changes:
- Click on the “Update File” button to save your changes.
Step 2: Verify the Integration
(a). Visit Your WordPress Website:
- Open your WordPress website in a new browser tab.
(b). Check Real-Time Tracking in Google Analytics:
- Go back to your Google Analytics account.
- In the left sidebar, navigate to “Realtime” and check if your website is actively being tracked.
So now, you have successfully added Google Analytics to your WordPress website. The tracking code is now included on all website pages, allowing Google Analytics to collect data and provide insights into your site’s performance.
Adding Google Analytics by Using Google Tag Manager
Using Google Tag Manager (GTM) to add Google Analytics to your site is another flexible and centralised method. This allows you to manage various tracking codes and scripts from a single location.
To use this method, you must set up a Google Tag Manager Account by signing into the Google Tag Manager website. Begin by following the prompts to create a new account and container. Enter your account name and container name (for your website), and choose the appropriate target platform (Web).
Step 1: Create a Google Tag Manager Account: Sign up for a free Google Tag Manager account.
Step 2: Install the Google Tag Manager Plugin: Install the Google Tag Manager plugin on your WordPress website.
Step 3: Add the Google Analytics Tag: Create a new tag in Google Tag Manager and choose the Google Analytics tag type. Enter your tracking ID.
Step 4: Publish Your Changes: Publish your changes in Google Tag Manager.
So now, you can check Google Analytics Real-Time Reports by returning to your Google Analytics account. Move to the left sidebar, navigate to “Realtime”, and review if your website is actively being tracked.
Additional Tips for Using Google Analytics
Following the methods above, you can use Google Analytics to understand how people perceive your WordPress website. Let us give you some additional tips and information that can help you improve your website and make it more successful.
- Clear Cache: If you’re using a caching plugin, you may need to clear your cache after adding the Google Analytics tracking code.
- Use Google Debugger: You can use the Google Analytics Debugger to test your tracking code.
- Keep Learning: There are many resources available online to help you learn more about Google Analytics.
Conclusion
Adding Google Analytics to your WordPress website is a fundamental step toward understanding and improving your online presence. By following these simple steps, you’ll unlock a wealth of data that can guide your content strategy, marketing efforts, and overall website optimisation.
An expert and experienced WordPress website development company knows how important it is to integrate Google Analytics into your site. Thus, they can advise you to incorporate it during the development phase.
So, keep monitoring your analytics regularly to stay informed and adapt to the evolving needs of your audience.
FAQs
Q1: Is Google Analytics free for WordPress websites?
Ans: Yes, Google Analytics offers a free version that is sufficient for many small- to medium-sized websites. You can follow easy steps to sign up for a Google Analytics account at no cost and start tracking your website’s performance.
Q2: Can I track the performance of specific pages or posts using Google Analytics?
Ans: Yes, Google Analytics allows you to track the performance of individual pages or posts on your WordPress site. Use the “Behavior” reports to analyse pageviews, average time on page, and other relevant metrics for specific content.
Q3: Can I add Google Analytics to my WordPress site without professional help?
Ans: While adding Google Analytics manually is possible, hiring a WordPress development company ensures a smooth and customised integration. Professionals can address specific requirements, set up advanced tracking, and troubleshoot any technical issues that may arise.
Q4: How do I choose the right WordPress development company for Google Analytics integration?
Ans: Consider factors such as the company’s experience with WordPress development, expertise in analytics integration, client reviews, and portfolio. Ensure they provide tailored solutions based on your business goals for effective tracking.